The head is considered to be the north of the body while the feet are at the southern part. This way the exterior or the back of the body is the western or the Pashchim (west in Sanskrit) and anterior part is the east. As the name suggests the Paschimottanasana is all about “uttana” or expanding the western part of the body. In this pose the head is moved towards the feet from the back, so the back experiences maximum expansion.
BENEFITS:
- Just like the jaanurshishasana, this asana aids in toning the spleen and the liver to aid digestion
- It also activates the pancreas and improves the secretion of insulin.
- Tones the legs and improves the strength o the hamstrings and calf muscles
- It helps in healing sciatica pain
- As the back is stretched, the irregularities in the spine are corrected and it becomes flexible or agile.
- Due to the extra stretch in the pelvic region, gonads receive more blood circulation and hence more oxygen in absorbed. This leads in absorption of more nutrition form the blood in the gonads.
- This asana is also great to remove anger, anxiety and stress.


STEPS:
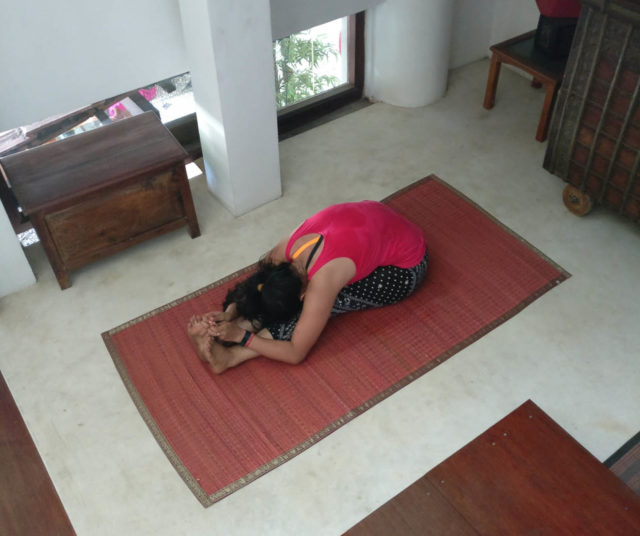
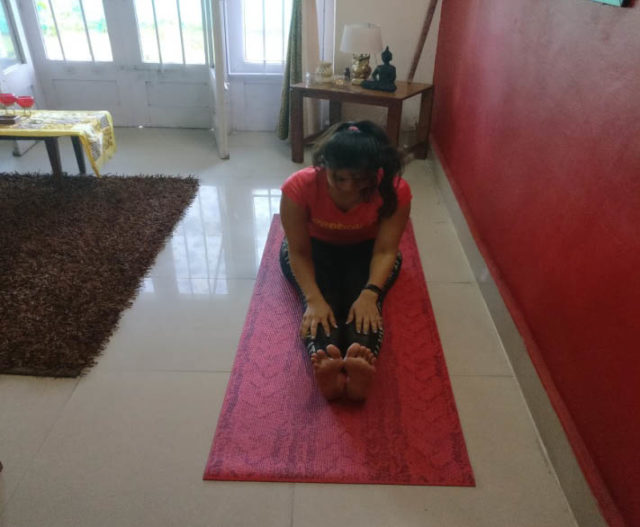
- Sit on the floor, with legs stretched in front
- Inhale and extend your hands up. The hands should be parallel to each other
- Extend your spine up as you inhale and fill up the lungs.
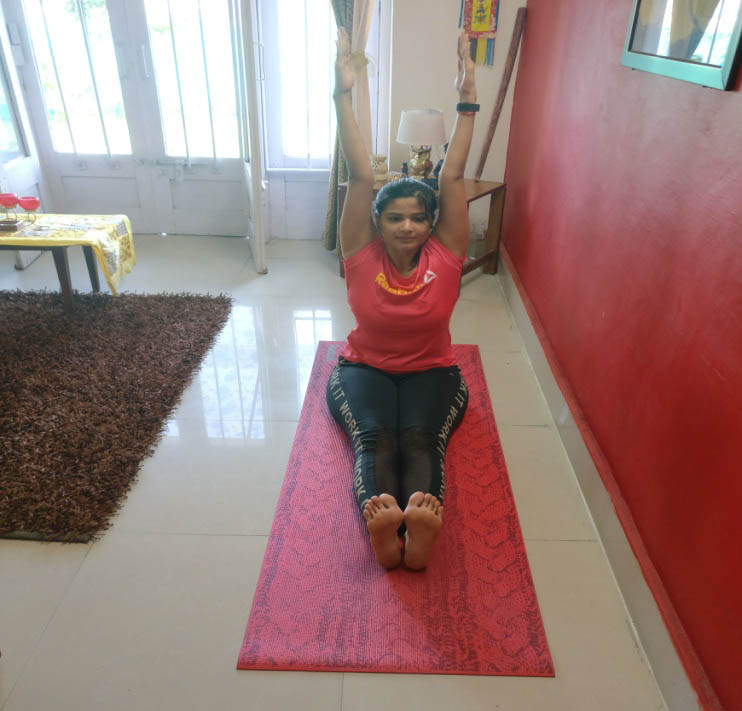
- Now exhale full and slow while taking your head and arms forward towards the leg.
- REMEMBER: In case of back pain or slip disc, do not push yourself too much forward.
- Try to reach to reach forward with both your hands and keep the back straight.
- Go with deep breaths forward, and remember to push yourself a little forward every time you exhale.
- It is not important to touch the head on the leg in one go, so take your time and keep the back and leg straight.
- If you are not able to reach the foot, hold the ankle/shin/knee, but keep challenging yourself and keep pushing forward.
- Tighten the knees and keep the right leg straight during the asana.
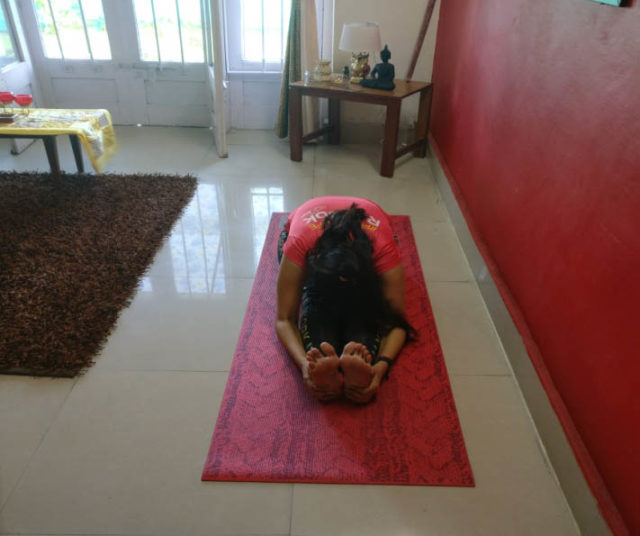
- Exhale and extend your trunk forward by bending and widening the elbows. Rest the forehead first on the leg, then the nose and then the lips and chin.
- Keep the toes stretched in and heels out.
- Keep on pulling the trunk forward and keep the chest against the thighs.
- Hold this asana for some time.
- Inhale to raise the head and slowly return to the normal posture.
STEPS EXPLAINED IN DETAIL
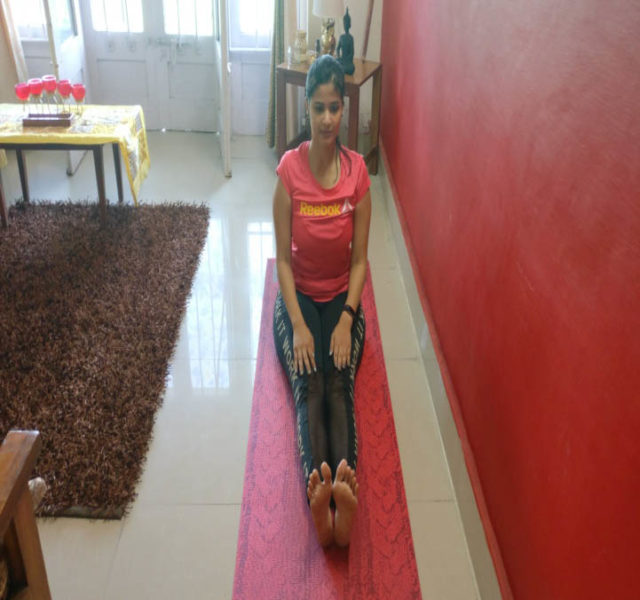
Sit on the floor, with legs stretched in front. Inhale and extend your hands up. The hands should be parallel to each other.

Extend your spine up as you inhale and fill up the lungs as you inhale. Breathing full and extending the spine will help in opening the spine. Now exhale out fully and slowly and as you do that take your head and arms forward towards the legs.
REMEMBER: In case of back pain or slip disc, do not push yourself too much forward.
Keep your hands on thighs and then slide them forward breath by breath. Try to reach forward with both your hands and keep the back straight. Go with deep breaths forward, and remember to push yourself a little forward every time you exhale out. Remember, It is not important to touch the head on the legs in one go, so take your time and keep the back and legs straight. Work on the muscles at the back of your knee and ensure they are stretched. Also to make sure your knee is straight and stretched maximum, stretch the heel out and point the toes towards the body. If you are not able to reach the foot, hold the ankle/shin/knee, but keep challenging yourself and keep pushing forward. The moment you feel that you are comfortable, that is the time to go a little forward with your hands than before. Keep on pulling the trunk forward and keep the chest against the thighs. Hold this asanas for few easy breaths and come back by lifting the head first. After doing that, take the support of the hands and lift your hands up. Inhale and release the hands and sit in dandasana.
After Pashchimottanasana do the Pavanmuktasana roll
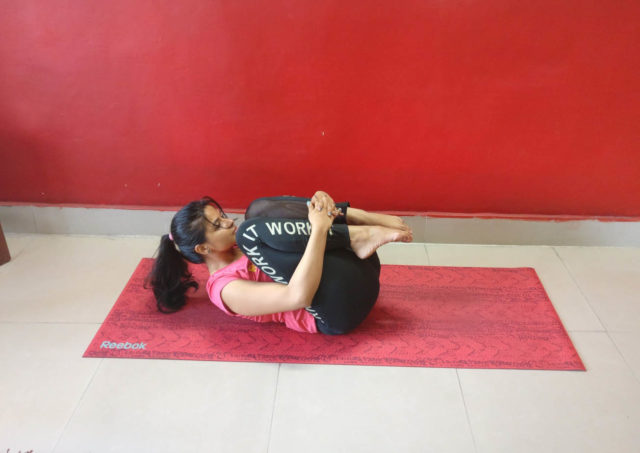
It is necessary to go for a counter asana after every challenging asana. Pavanmuktasana is one such asana that can be done right after the pashchimottanasa to relieve unwanted pressure from the back. To do the pavanmuktasana roll, lie down on your back with straight hands and legs. Now bend your knees and bring them closer to your chest. Roll your hands around your knees and hold your wrists outside the knees, so you are hugging your knees tight. Now as you do that the knees squeeze your chest and stomach. Now just roll forward and backward gently. Every time you inhale go back and as you exhale roll forward. This asana will relax the muscles of the back and increase the blood flow in your back.


")


")
")
")